Have you recently started a new business and are getting serious about digital marketing? If yes, you’ve come to the right place. At Mbial, we specialize in paid digital marketing strategies for platforms like Facebook and Instagram. But before you think about running paid campaigns on Meta, it’s crucial that your account is set up correctly and that users have the appropriate permissions assigned to it.
Adding users is one of the most important steps in using Meta Business Suite correctly. As a result, you will ensure that the necessary security safeguards are in place to prevent your account from being hacked. By setting the correct permissions, you can also control who has access to what actions they can and what they can perform. The days of sharing passwords to access your Facebook page are over!
Unfortunately, if you are unfamiliar with Meta Business Suite, you will find it intimidating and confusing. But don’t fret! In this post, we will break down every step in getting your account ready for adding new users so you know exactly what to do.
Table of Contents:
1. What is Meta Business Manager?
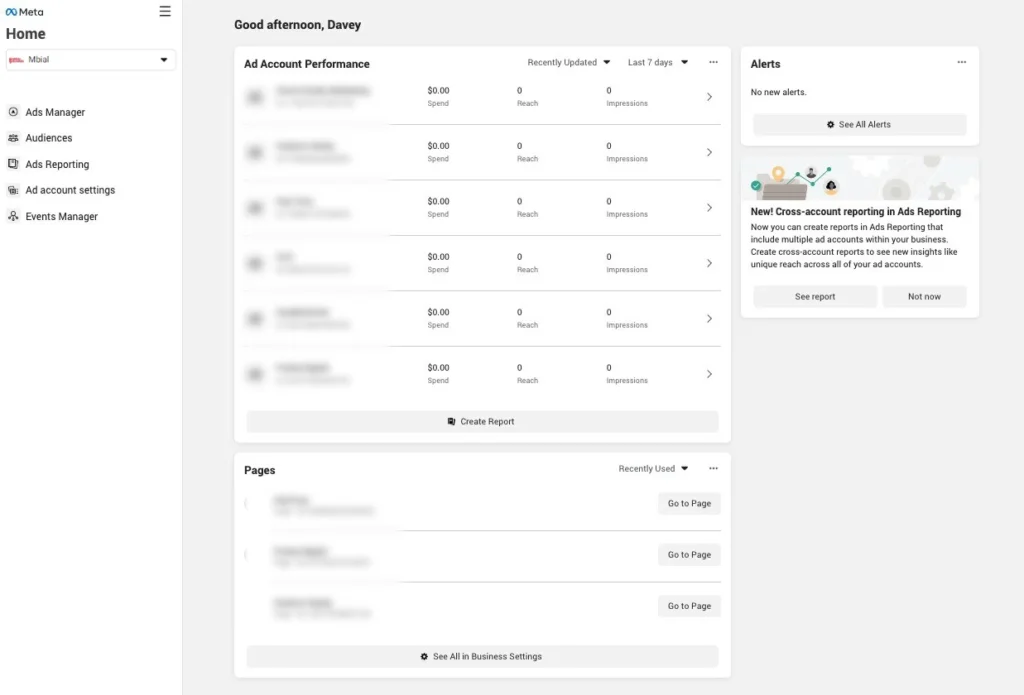
Meta Business Suite is a tool for managing all of your Facebook and Instagram marketing and advertising activities in one place. It integrates with apps to help you connect more effectively with your customers.
Meta Business Suite contains Ads Manager, where you can set up and run Facebook and Instagram ads. Additionally, Business Suite makes viewing and responding to notifications easy across all devices. The platform lets you compose and schedule posts, stories, and ads for your business and find valuable insights to optimize your future efforts.
2. Who Needs Meta Business Suite?
Meta Business Suite is helpful for businesses, brands, content creators, non-profits, and so on. Even if your intention (right now) isn’t to run paid advertising, Meta Business Suite is a great tool to help you engage with your audience, schedule content, and manage integrations across other digital marketing apps.
3. Getting Started with Meta Business Suite
Before we begin adding users to the business, some important things must be set up. Review and take action on the following steps; otherwise, you’ll have to adjust permissions after the fact.
4. Permission Levels in Meta Business Suite
There are five types of access roles you can add people:
4.1. Partial Access (Employee Access):
Employees can only make changes to accounts assigned by the admin. It is recommended that you give anyone access to the account at this level. That way, you can control who can make changes to business settings.
4.2. Full Access (Admin Access):
Admins have complete control of your Business Settings in Meta Business Manager.
4.3. Finance Analyst:
This type of access allows users to view financial details such as transactions, invoices, account spending, and payment methods.
4.4. Finance Editor:
Users can update payment methods and access documents such as invoices, transactions, and other billing details with this access.
4.5. Developer:
It allows users to set up conversion APIs, monitor events, edit applications, and handle other account technical aspects.
5. Types of Access in Meta Business Suite:
Once you’ve added an employee or admin to your account, the next step will be to decide on their access level. Since you assign individual assets to users (pages, Instagram accounts, pixels, ad accounts), this second level lets you choose what type of access they have to those assets.
There are two types of access you can assign to individual assets:
5.1. Standard Access:
You can toggle on each specific task you’d like this person to access.
5.2. Admin Access:
There’s only one option here, which allows this person to manage the entire asset. This will give them full control over viewing and making changes.
6. Linking Facebook and Instagram Pages:
Since individual assets assign access, you should first ensure that all Facebook Pages and Instagram Accounts are added to the account. This way, when adding employees, you can assign them the level of access they need to reach all in one go.
6.1. Getting Started:
Before you get started, you’ll want to prep a few things:
- Have a Facebook page already created (you must be an admin of the page for a minimum of 7 days)
- Have an Instagram business account and have the username and password ready
- A Facebook or Instagram page cannot be owned by another business account. If it is attached to another account, the admin must remove it through the Business Manager.
- It’s recommended that your Instagram business account is already linked to a Facebook page.
- Log out of any personal Instagram accounts on your browser
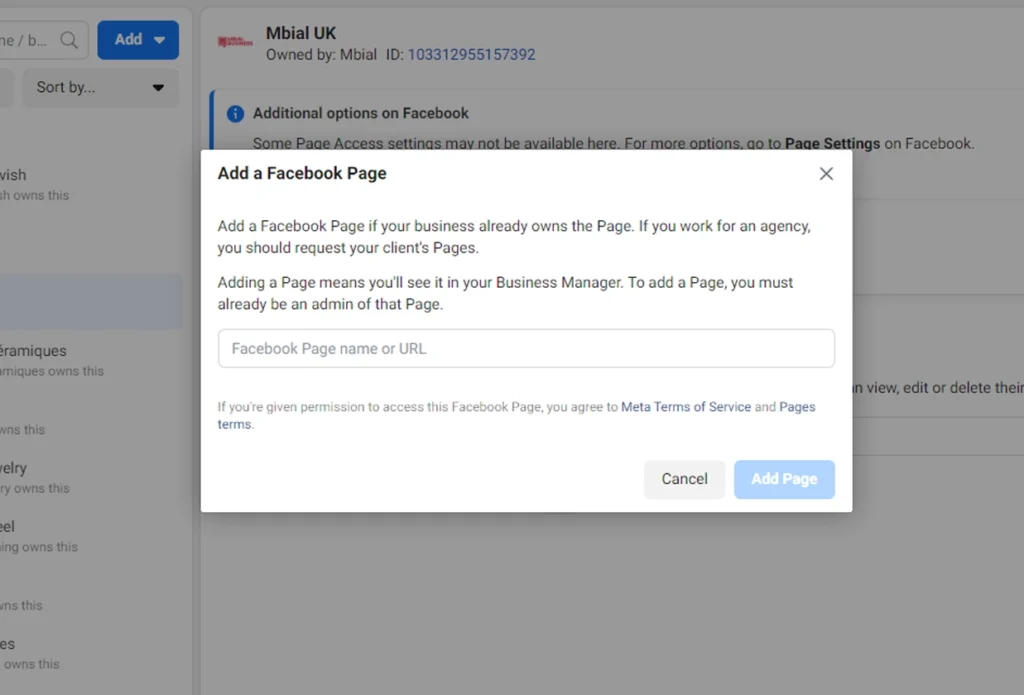
6.2. Add a Facebook Page:
- Navigate to the ‘Business Settings’ in the left panel (looks like a little gear symbol).
- Click on Accounts and then Pages under ‘Business Assets’
- Click the blue button that says Add
- Select Add a Page and enter the Facebook Page name or type in the URL
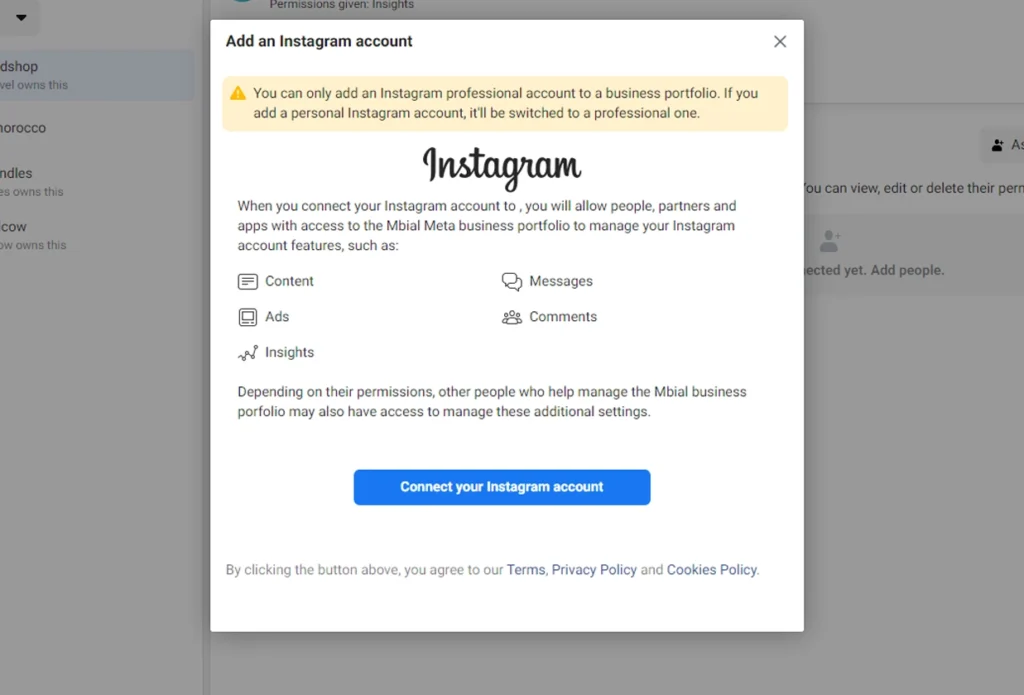
6.3. Add an Instagram Account:
- Returning to Accounts in ‘Business Settings,’ click on Instagram Accounts. This time
- Click the blue Add button
- Click Connect your Instagram accounts
- You’ll be prompted to enter your Instagram username and password. Follow the prompts.
7. Give Permissions to New Users on Meta Business Suite:
Now that you’ve added Facebook Pages and Instagram accounts, we’re finally ready to add users to the account.
Note: Before this step, you may also want to add Facebook Pixels, Ad Accounts, or Product Catalogs to the account if you have them. If not, it’s no problem; you can always do this later.
8. Steps to Add and remove users from Meta Business Suite
Now, let’s get people added to the account! There are a few simple steps:
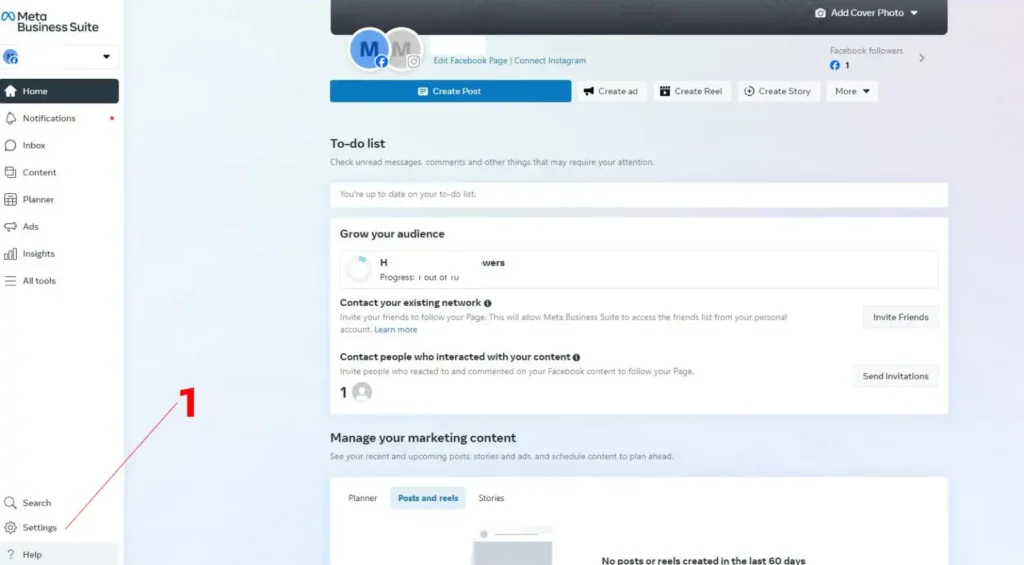
1. Go to (Business.facebook.com) then click on settings.
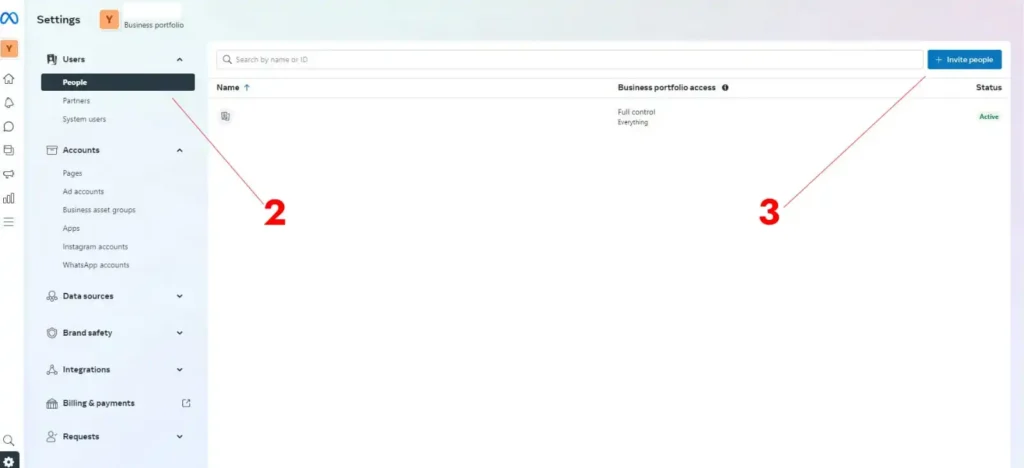
2. Select People under Users.
3. Click on Invite People.
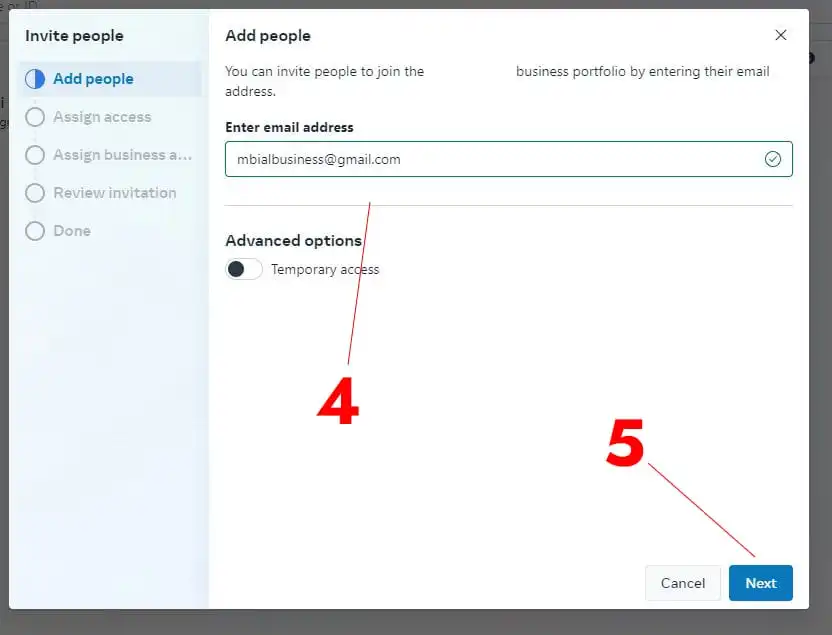
4. Type the email of the person you are trying to add.
5. Click on Next
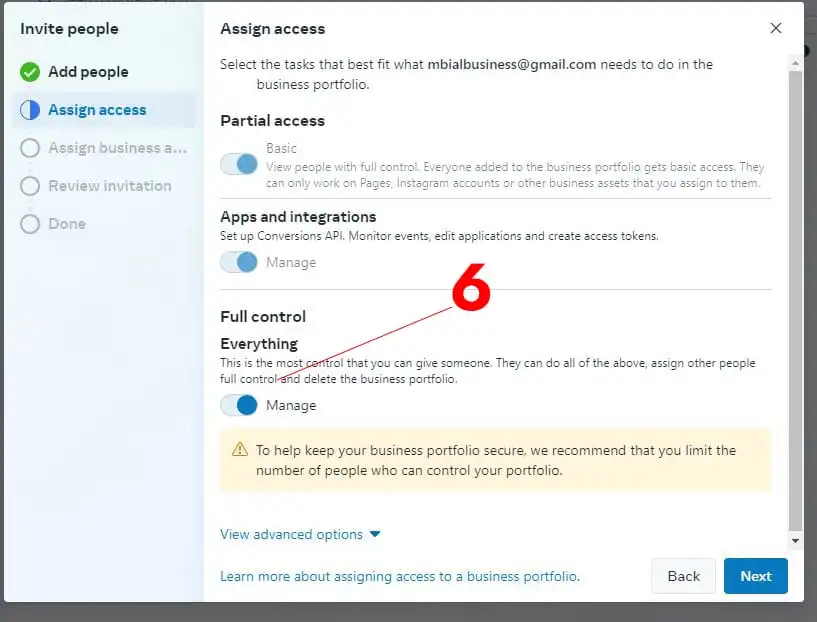
6. Click on the option under Full Control if you want to give that person full access otherwise the access will be Partial then click on Next
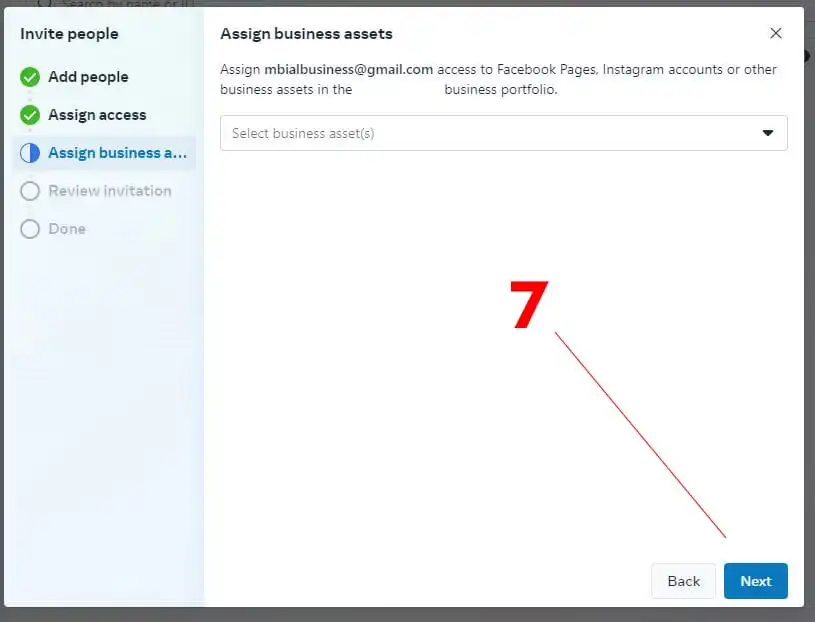
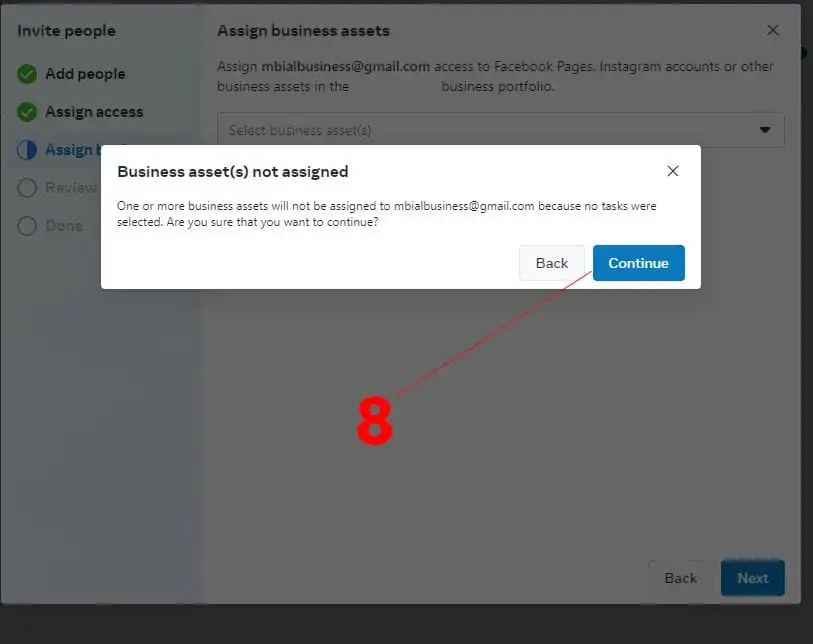
7. Select the assets you want then click on Nest.
Note: if you didn’t select anything from the business assets, and you just clicked on Next then you will see a pop up asking you to confirm (check screenshot below)
9. Click on send invitation
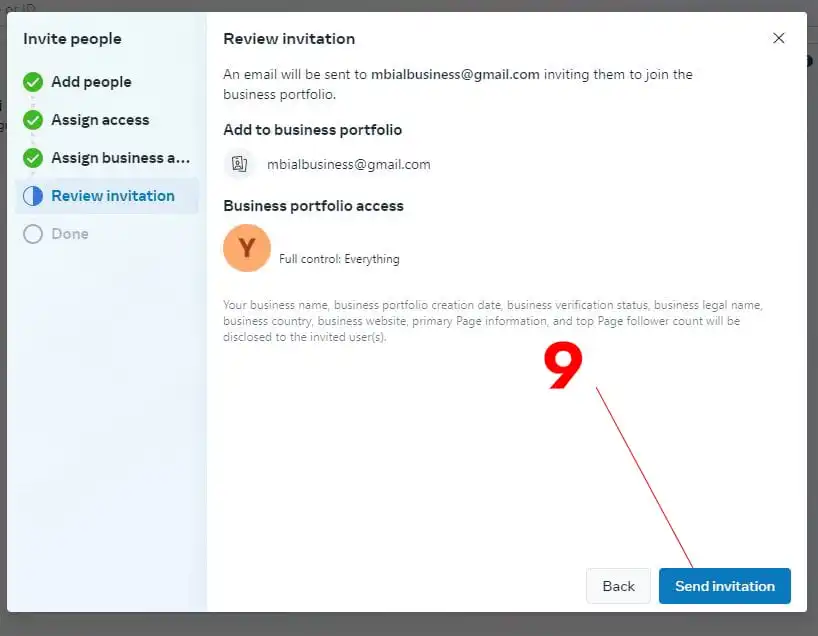
They will receive an invite with instructions on joining the Business account in their email.
9. Steps to Add Agencies or Add Business Partners:
What if you were considering hiring a digital marketing agency to help you with your digital marketing efforts? In this case, you would give access to the agency’s Business Account rather than add the individual people from that agency. This will give them free rein to make the necessary changes without asking you to do anything. Of course, you can limit their permissions just like any employee, but you should discuss with your partner what access is needed.
Before you begin, ensure that you have the following:
- Your business partner should have a Business Manager already set up
- They will need to provide you with their business ID.
The process is very similar to adding people:
- In ‘Business Settings,’ find Users and click on Partners
- Click the blue Add button
- Choose ‘Give a partner access to your assets’
- Enter the business ID provided in the field and hit the next
- Follow the next steps to provide permissions to the appropriate assets
You’re all set!
10. Enabling Two-Factor Authentication:
10.1. Applying Two-Factor Authentication to Your Account:
These days, you can’t be too careful when it comes to protecting your digital assets. This is why we highly recommend setting up two-factor authentication (2FA). Two-factor authentication provides an added layer of security that will help prevent unauthorized access.
Meta allows you to choose between logging in using 2FA for admins only and everyone. Only business admins can turn on two-factor authentication.
- Go to Business Settings in Business Manager
- Click on Business Info
- In the left-hand column, scroll to Security Center
- Under Two-Factor Authentication click the dropdown menu
- Select Admins or Everyone (choosing ‘No one’ will leave 2FA off)
10.2. Setting Up Two-Factor Authentication on Users’ Personal Accounts:
Now that this is enabled, users will need to set up two-factor authentication on each of their personal Meta accounts. You must log in through your personal Meta account to access Meta Business Suite. When logging in from a new browser, users will be prompted to enter a unique login code through one of three security methods:
- Tapping a security key on a compatible device
- Use a login code from a third-party authentication app
- Get a code sent to your mobile phone via text message (SMS)
Send this guide to your employees for full details on how to set up 2FA on personal accounts.
11. Start Meta Advertising Today:
Ready to promote your online business or product through paid advertising? Mbial offers end-to-end support for getting your paid digital marketing campaigns up and running. From strategy to campaign launch and optimizations, we’ll ensure that we start on the best foot forward and keep the momentum going once your campaign is live.
If you want to reach people, Facebook and Instagram advertising is one of the most affordable and effective options for businesses. Get in touch with us today, and let’s get started!